I didn’t get the crafty gene. All the other females in my family received it, but me – I don’t do crafts well. I have other talents for sure, and luckily I’m good at reading directions! When the ‘crafty’ bug gets me I always look for someone else’s ideas to follow, and that’s what appeals to me about my guest post today! Simple, easy to follow directions will let even the clumsiest crafter create a gift worthy of giving – just check it out and see for yourself! And please check back when you’re done and let me know how it turned out!
Low-Cost, Easy Holiday Christmas Craft
By Debbie Ward of Lucky Paper Girl Arts
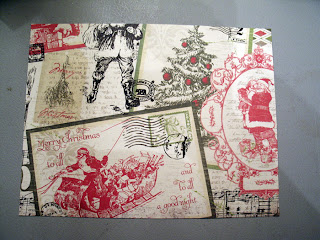
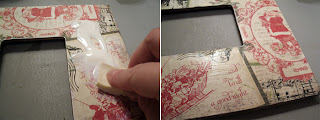
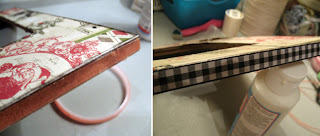
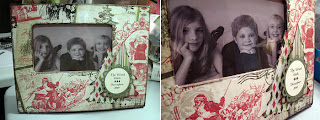
Here’s how make a beautiful holiday frame with deep personal meaning out of an ordinary, inexpensive craft store frame. Not only is this a fine way to display one of your most treasured photos, it also makes a heartfelt and appreciated gift. Like to scrapbook? You probably have almost all of these supplies on hand already!
Supplies: Unfinished frame, Mod Podge, Holiday Designer Paper, Die Cuts or other Embellishments, Red Line Tape, Ribbon, Sanding Block, Craft Knife, Circle Punch, Distressing Ink, Photo
1. Purchase an inexpensive frame from your craft store and take the glass and frame back off.

This project can also be completed by older children for grandparents or extended family — with the exception of the craft knife step, and a parent can assist with that. My daughters also do this for their friends on their birthday; they change the paper and put in a picture of them with the birthday girl/boy. This project can be adapted to any season of the year. I was able to complete this project for under $5…a deal by any standards!
Elin Coats writes and edits for FavorIdeas, and wants to put flamingo feathers on her Christmas tree this year. She hopes you’ll stop by for adorable favors designed for fun holiday parties.


Comments: 6
Bella
December 10, 2011Oh, I love this project! I think I may even be able to pull this one off! But I’m wondering if something else can be substituted for ModPodge. I’ve never been able to find it in Europe. Suggestions welcome! 🙂
mamawolfe
December 10, 2011Hi Mary~ Never say never! You might surprise yourself! Thanks for stopping by.
Hi Terri~ I agree-the author did a great job! Makes it seem like anyone can do it!
Hi Carla~ Thank you! I’m glad you liked mamawolfe-I sure do!
Susan~ Awesome! Let me know if you make it, and send me pictures of how it turns out!
Susan Kane
December 9, 2011I have been wondering about this very same project, but wasn’t sure how to do it! Thanks!
Carla
December 9, 2011Love your blog!! SO many great ideas I want to try! I don’t know if that’s good or not… but here I go! Blessings, Carla
Terri's Little Haven
December 9, 2011What a great guest post. The instructions are simply to follow even I could make this. I didn’t get the crafty gene my mom and sisters got. I bet my grandkids would love to make this.
FrankandMary
December 8, 2011Ok. I’d never do this, but that doesn’t mean I do not appreciate that it was done well. By someone else(that is the best part to me). ~Mary