Tag: Recipes

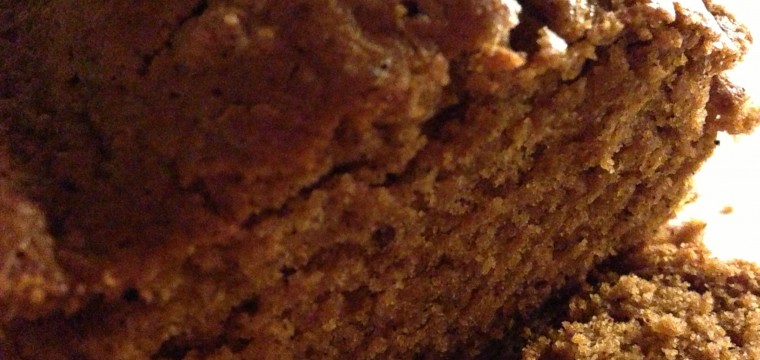
The Comfort of Home…and a Pumpkin Bread Recipe, Too

Posted on November 25, 2013 by


“There is nothing like staying at home for real comfort.”

– Jane Austen

Wherever you find yourself this week, I hope you find the comfort of home.

Fill your home with love and the flavors of fall with this delicious pumpkin bread recipe-a perfect way to spend an hour with someone you love!

  • 2 1/2 cups flour, plus more for dusting the pan

  • 3 teaspoons ground cinnamon

  • 2 1/2 teaspoons baking powder

  • 2 teaspoons ground ginger

  • 1 teaspoon salt

  • 1/2 teaspoon ground cloves

  • 1/4 teaspoon ground nutmeg

  • 1/2 cup packed light-brown sugar

  • 1/4 cup granulated sugar

  • 1/2 cup butter, room temperature

  • ¼ c. ground flax seed

  • 1 ½ heaping cups pumpkin puree (fresh or one 15-ounce can)

  • 3 eggs

  • 1 1/2 teaspoons vanilla

Preheat oven to 350 degrees. Blend sugars with butter and flax seed until light and fluffy. Add remaining wet ingredients (pumpkin, eggs, vanilla) and mix well. Sift together dry ingredients and add to wet mixture. Mix just until combined. Pour batter into greased loaf pans. Bake for approximately 50-55 minutes, or until bread doesn’t jiggle and a toothpick tester comes out clean. Cool bread in pan on a baking rack for 15-20 minutes, then remove gently. Find a warm spot near the fireplace to snuggle up and share at home with those you love and are grateful to have in your life. Then bundle up, take a walk, and see all the beauty that surrounds you!

~adapted from One Hungry Mama, I decreased the amount of sugar and fat and substituted flax seed to keep the bread rich and most, and a bit healthier, too!

Davis trees in NovemberAngel Trumpet tree

November sky in Davis

Enhanced by Zemanta

Jennifer Wolfe

Jennifer Wolfe, a writer-teacher-mom, is dedicated to finding the extraordinary in the ordinary moments of life by thinking deeply, loving fiercely, and teaching audaciously. Jennifer is a Google Certified Educator, Hyperdoc fanatic, and a voracious reader. Read her stories on her blog, mamawolfe, and grab free copies of her teaching and parenting resources.
More Posts - Website

Follow Me:
TwitterFacebookLinkedInPinterestGoogle PlusYelp

Guest Blogger: Making Marshmallows With Kids For Valentine’s Day

Posted on February 11, 2013 by

Now that my kids are teens, some of our holiday traditions have sadly disappeared in the mess of homework, sports, and their complicated social lives.  I have to admit my heart pangs a little bit for those simple days of preparation for delivering Valentines to their elementary school classrooms…but with this guest post by my friends Nicole and Sara of Simply Happenstance, I can live vicariously as they share their joy of creating Valentine’s Day marshmallows…aren’t they adorable?

Who doesn’t love marshmallows… especially, homemade marshmallows to sprinkle on top of a rich and foamy cup of hot chocolate? With Valentine’s, just around the corner, I thought the timing was perfect to recreate my favorite marshmallow recipe. This recipe allows for little hands to help cut out the finished marshmallows into heart shapes with small cookie cutters. My kids love assisting me in the kitchen, and especially love seeing the process from start to finish. A fun activity for a day stuck inside with the flu {as it helped to brighten their spirits since they could not play outside}.

{Heart Shaped Marshmallow Recipe}
Adapted by The Barefoot Contessa (Ina Garten)

* 3 packages of unflavored gelatin
* 1 ½ cups granulated sugar
* 1cup light corn syrup
* ¼ teaspoon kosher salt
* 1 tablespoon pure vanilla extract
* Confectioners’ sugar for dusting
* 2 drops of pink food coloring or paste
* 2 small heart shaped cookie cutters {I found mine at Target}

Combine the gelatin and ½ cup cold water in the bowl of an electric mixer fitted with a whisk attachment for mixing later.
In a pan, combine the sugar, corn syrup, salt, and ½ cup of water. Cook over medium heat until the sugar dissolves. Raise the heat to high and cook the syrup until the mixture reaches 240 degrees with a candy thermometer.

Next, take the candied mixture and slowly pour it into the bowl with the electric mixer. Begin mixing on low {I advise doing all of the above without the kids around, as this part of the recipe is very hot}.
Add in the vanilla and food coloring at this point, meanwhile change the mixer speed to high, mixing for approximately for 15 minutes until the mixture is very thick.
With a sieve, sprinkle confectioner sugar over a non-metal 9×12 inch-baking pan.
I do suggest spraying a paper towel or using a little butter to wipe over the pan first to keep the marshmallows from sticking to the pan.
Place the pan into the oven over night in order for the marshmallows to dry out.

IMG_1420

When you wake up in the morning you have magically created the largest rectangle marshmallow you kids have ever seen!
The wait is finally over! Take the mixture out and place it on a large cookie sheet dusted with additional powder sugar for shaping the marshmallows.

IMG_1443

Now here comes the fun part for the kiddos! Time to shape the marshmallows……

IMG_1445

IMG_1472

Or maybe steal a taste of one or two…..

IMG_1478
IMG_1484

The marshmallows taste very fresh. The kids were proud that we made them with our own hands. Mason and Madeline have enjoyed these little heart shaped masterpieces in their hot chocolate. They are also perfect as a stand-alone treat. Store these fluffy pink hearts in a sealed storage container. They stay fresh for at least a week of enjoyment.

IMG_1497

IMG_1523

We hope you whip up a batch for a cupid or two! I am sure they will put a smile on anyone’s face. Happy Valentine’s Day!

Enjoy
XO,
Simply Happenstance

Nicole and Sara reside in Southern California. Their blog {Simply Happenstance} is about the simple happenings in life…a return to the old with a hint of the new. They are two mommies who are both married to firefighters, trying to balance life {with their 6 kids between the two of them}. They blog about their shared passion for baking, as well as, highlighting the things in life that are simple, yet beautiful.My HipstaPrint 915072965

Enhanced by Zemanta

Jennifer Wolfe

Jennifer Wolfe, a writer-teacher-mom, is dedicated to finding the extraordinary in the ordinary moments of life by thinking deeply, loving fiercely, and teaching audaciously. Jennifer is a Google Certified Educator, Hyperdoc fanatic, and a voracious reader. Read her stories on her blog, mamawolfe, and grab free copies of her teaching and parenting resources.

More Posts - Website

Follow Me:
TwitterFacebookLinkedInPinterestGoogle PlusYelp

baking with mamawolfe: Lily’s Apple Tart

Posted on December 2, 2012 by

I guess by some people’s standards I have a large family.  Three sisters, two brothers – some with different moms, but all the same dad.  Four of us have our own children, three have spouses, and all have dogs.  Throw in a few miscellaneous relatives that typically show up for holiday gatherings (occasionally including my mom, long divorced from my dad) and we end up with quite a crew.
We all anticipate different parts of the gathering, but aside from seeing siblings and those relatives coming in from out of town, one of my most looked forward to parts of the holidays is baking dessert with my daughter.  Spending the day in the kitchen with her is incomparable; we talk, laugh, strategize and sometimes even sing – anything Taylor Swift being our favorite baking accompaniment.
This year, we decided to go simple yet elegant, and adapt a recipe from one of our favorites, Ina Garten.  Her apple tart just seemed like the perfect complement to a heavy dinner: sweet apples, flaky crust, and a tang of apricot jam make this simple dessert one you’ll want to try for any holiday gathering.  So grab your favorite baking partner, crank up the tunes, and have some fun!
You’ll need:
For the pastry:
2 c. flour
1/2 t. salt
1 T. sugar
1 1/2 sticks cold butter, diced
1/2 c. ice water
For the apples:
4-5 Granny Smith apples
1/2 c. sugar
1 T. cinnamon
1/2 stick cold butter, diced
1/2 c. apricot jam
2 T. water
Steps:
To make the pastry, put flour, salt, and sugar in a food processor and pulse for a few seconds to combine.
Add the butter and pulse until it is the size of small peas.
With motor running, pour ice water down feed tube and pulse just until dough sticks together-not too long or the pastry will be tough.
Knead into a ball on a floured board.
Wrap in plastic and refrigerate 1 hour.
Preheat oven to 400 degrees and line a baking sheet with parchment paper.
Roll the dough approximately 10×14 inches.  Trim the edges-it’s a rustic tart, so no need to be perfect.  Refrigerate the dough while preparing the apples.
To make the apples, peel and cut them in half through the stem.  Be sure to remove stem and any leftover peel.
Use a melon baller to scoop the core – it leaves the apples in a pretty shape.
Slice apples crosswise in about 1/4 inch slices.  Try to be uniform.
Lay apple slices diagonally down the center of the pastry first, then fill in the sides until it is covered.
Sprinkle with combination of sugar and cinnamon.  Dot with butter.
Bake about 45 minutes until pastry is browned, and edges of apples start to brown.  Rotate after 20 minutes.    Watch carefully – if it starts to drip in the oven, place another sheet below to catch the mess.
When baked, heat the apricot jam with water and spread completely over the top.
Loosen tart so it doesn’t stick.  When cool, slice in squares.  Can be served warm or at room temperature.

Jennifer Wolfe

Jennifer Wolfe, a writer-teacher-mom, is dedicated to finding the extraordinary in the ordinary moments of life by thinking deeply, loving fiercely, and teaching audaciously. Jennifer is a Google Certified Educator, Hyperdoc fanatic, and a voracious reader. Read her stories on her blog, mamawolfe, and grab free copies of her teaching and parenting resources.

More Posts - Website

Follow Me:
TwitterFacebookLinkedInPinterestGoogle PlusYelp

baking with mamawolfe: Glowie’s Cranberry Bread

Posted on November 25, 2012 by

One of my favorite kids in the whole world is named Gloria – we call her Glowie for short.  She’s the kind of kid that is quiet on the outside, but full of life on the inside. We’re related.
A couple of years ago my kids and I spent some time at her house – it was back when she was in preschool.  We don’t see each other too often; she lives 500 miles away (California is a big state).  Ever since I can remember, one of the ways I’ve bonded with kids is through baking.  Sure enough, Glowie’s mom felt the same way, and she had just pulled a loaf of this delicious orange-cranberry bread out of the oven.
One taste, and we were goners.  My kids and I helped to quickly devour the entire loaf!  Since then, Glowie’s Cranberry Bread recipe (straight from her preschool) has become a treat in our house.  It’s easy to double, and you can adjust the sugar amount up or down depending on your taste.  We like it on the less-sweet side ourselves.  I guarantee that if you have a kid in the kitchen with you, you’ll make some happy memories with Glowie’s Cranberry Bread recipe.
You’ll need:
2 c. flour
1 c. sugar (decrease if desired)
1 1/2 t. baking powder
1 t. salt
1/2 t. baking soda
1/4 c. softened butter
1 egg, beaten
1 t. grated orange peel
3/4 c. orange juice
1 1/2 c. fresh cranberries, chopped
 

Steps:

Preheat oven to 350 degrees.

Sift dry ingredients together.

Cut in butter.

Add egg, orange peel, and orange juice all at once.

Stir ingredients together.

Fold in cranberries.

Spoon into greased 9x5x3″ loaf pan.

Bake at 350 for approximately 1 hour 10 minutes.

Jennifer Wolfe

Jennifer Wolfe, a writer-teacher-mom, is dedicated to finding the extraordinary in the ordinary moments of life by thinking deeply, loving fiercely, and teaching audaciously. Jennifer is a Google Certified Educator, Hyperdoc fanatic, and a voracious reader. Read her stories on her blog, mamawolfe, and grab free copies of her teaching and parenting resources.

More Posts - Website

Follow Me:
TwitterFacebookLinkedInPinterestGoogle PlusYelp